
The bootloader is a small program in the control module that allows firmware updates to be programmed into the module via USB. The bootloader is in protected memory, so even if something goes wrong you should still be able to access the bootloader and try again.
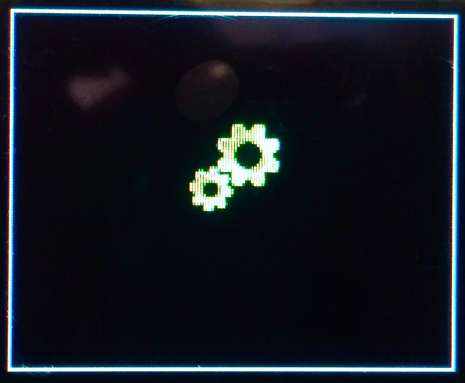
You won't see the bootloader unless either no firmware is present, or you forced the unit into bootloader mode. Memory is usually only empty if you got a blank DashComputer, or if you erased the firmware yourself. So you'll usually have to force the unit into bootloader mode. In order to force the unit into bootloader mode, ground the bootloader input with the ignition off and then turn on the ignition. An alternative and simpler method is to hook up a terminal to the USB port and enter the magic numbers 25051977 and hit return. This will send you to the bootloader as well, but this method may not work if the firmware is somehow corrupt. The OLED screen should show the bootloader gear icon:
Now connect DashComputer to a computer or laptop using a USB-cable. The first time this is done the computer may look for a suitable driver. If no driver is found, you can download a suitable driver from FTDI. This installs a virtual COM port (VCP) on your computer.
Now open a simple terminal program like e.g. Hyperterm. Select the newly installed virtual COM port and set communication parameters to 9600 Baud, 8 Data bits, No parity, 1 Stop bit, no handshake (9600, 8N1). Now hit the return key. DashComputer should respond with a screen similar to this:
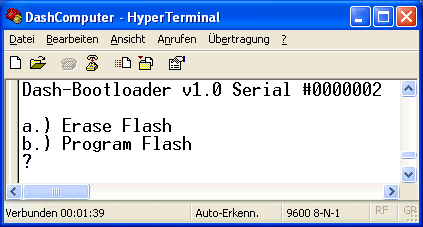
It displays the bootloader software version, your DashComputer's serial number and a menu with two choices: Erase Flash and Program Flash
Flashing the firmware: firmware, and more
The firmware of DashComputer may consist of one or multiple parts. The standard F-body or Fiero firmware consists of the base firmware file with a version number (which doesn't contain background graphics or splash screen), a background file and a splash screen file. Be sure to load the proper firmware according to your display, i.e. OLED or TFT!
Before a new firmware file or file set can be flashed, it is absolutely required to always first erase the existing firmware! Hit "a" and the bootloader will erase the existing firmware and graphics data. The progress is indicated on the display in a progress bar, and in the terminal program's window as well. When the erase process is complete, the bootloader returns to the main menu. Don't erase between the parts of a multipart firmware, or you will erase what you have already progammed!
With the memory erased, now a new firmware can be installed. First hit "b". IMPORTANT: DO NOT PRESS ANY OTHER KEYS! Now, use your terminal program to upload a text file (see your terminal program's help file for information on how to do this). Navigate to the firmware file you want to install - it should have the extension ".S19". Make sure your terminal program's file select box does not only look for "*.TXT"-files! While the firmware is being flashed, the terminal program will show the programming progress. The progress bar on the TFT/OLED display will display which portions of memory are being written. The DashComputer has 240K of memory, and the firmware will only use a fraction of it, so don't be alarmed. The TFT/OLED display will look something like this:
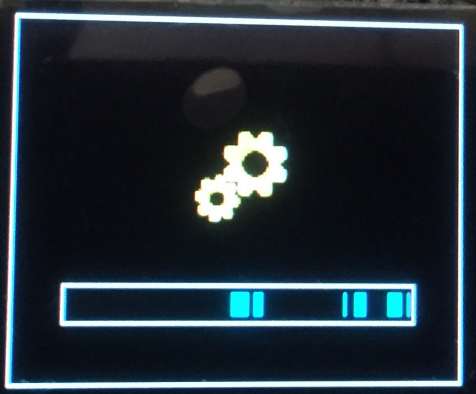
If the firmware consists of multiple parts (e.g. firmware, background and splashscreen) wait for the completion of each part, then hit 'b' again and upload the next part. Do NOT erase memory between parts, because this would erase what you previously flashed! If you look closely, you can see different parts of the firmware fill different parts of memory.
When the update process is complete, disconnect the bootloader input from ground (if applicable), turn off the ignition, wait a few seconds, then turn on the ignition again. The new firmware should launch now. You may have to reset the clock at this point. If the firmware doesn't start, restart the bootloader and repeat the process. If the update still fails, try to install the most recent firmware that worked with your unit to make sure the problem is not caused by a bad firmware file.
Using Android
If you own an Android device, there's good news: you can use it to install firmware, and it's pretty simple. You need an OTG-Cable to allow your Android device to act as a host, which you then connect to the DashComputer like you would a PC or laptop. You also need to download a serial port tool for FTDI devices like the free "FTDI UART Terminal v1.1".
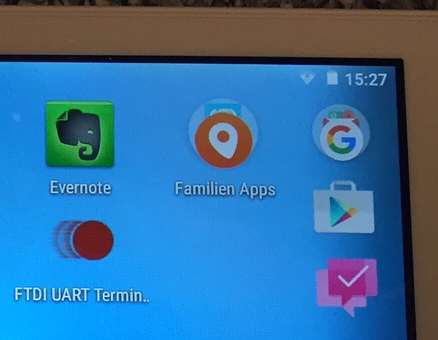
Now, as soon as you connect the tablet or phone to the DashComputer you will be asked some questions like whether or not you'd like to always start the FTDI app each time this device is connected. You do need to configure the port to "Flow Control: None" as shown in the screenshot, and then you're ready to "talk" to DashComputer with your phone!
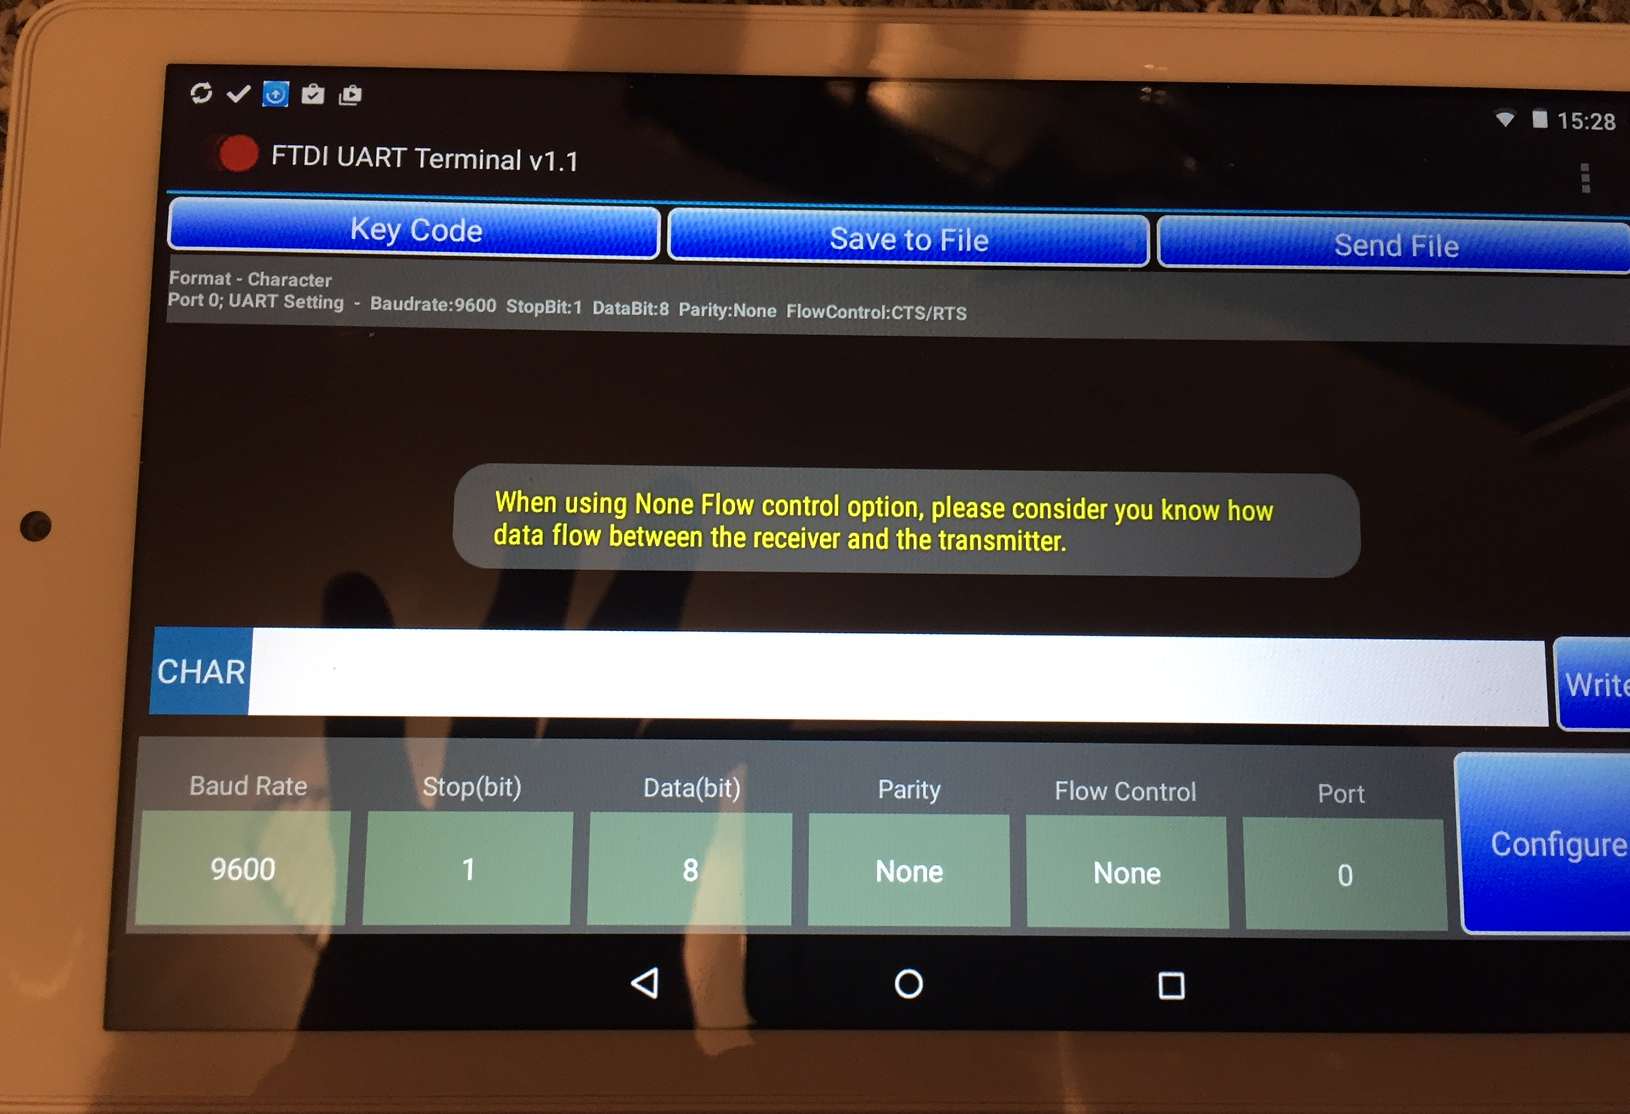
You just need to hit "CR" to send a "Carriage Return" key to get the menu. Then type the letter a into the white box marked "CHAR" and hit "Write": the Flash will be erased and the progress bar on the OLED as well as a progress bar in the terminal program will show the progress.
Next you will probably want to install another firmware file or the DashComputer will only show the boot screen from now on. So, download the firmware you want to install e.g. from these pages to your device and then enter "b" and nothing else (!) in the white box marked "CHAR" and hit "Write". Nothing will happen! Next, tap "Send File" on the top and select the Firmware file you would like to upload. Upload will start immediately, and if you did everything correctly, you will see a progress bar in the terminal app, and the boot screen will show which portions of memory are being written. If all goes well you can go back to the menu if you tap "CR" after download is finished.
Note: The FTDI app is not the greatest terminal program ever, I find e.g. Hyperterm much easier to use, and that alone says a lot. I've seen the app crash to the point that I had to erase it, reboot and reinstall it. But it does basically work and it's very convenient being able to install firmware like this. Even if something does go wrong, you can never blow the bootloader, so you can always go back and erase/flash the firmware again, or worst case do a firmware install from a PC.